How to replace Generation 4 Filter and/or Pump
How to Replace the Filter (VW / Audi Group)
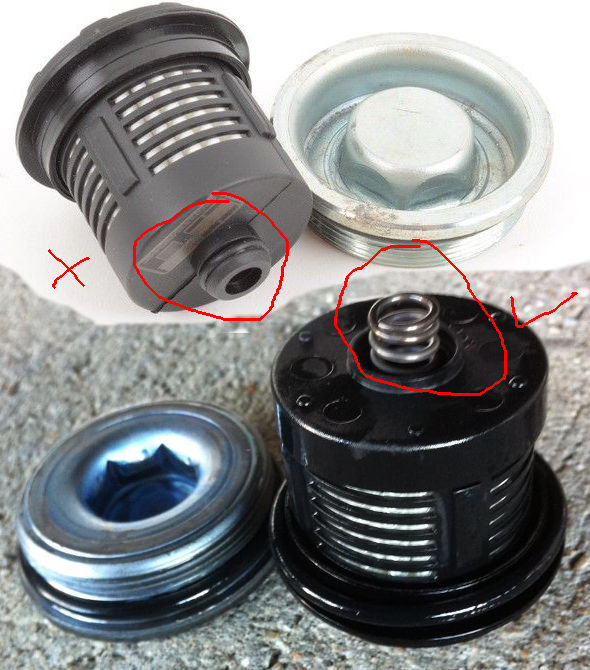
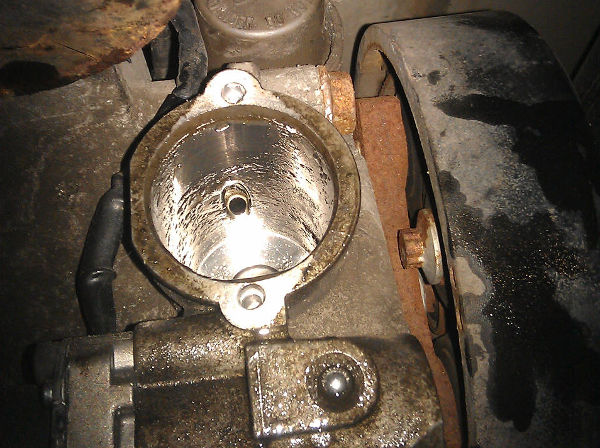
- Remove cover from filter housing via the 2 Allen bolts, pull cover off with slip joint pliers.
- Clean any salt around the edge of the white nylon retainer using pointed item such as Stanley blade, do not damage the aluminium housing.
- Put oil drain tray underneath the filter/pump assembly.
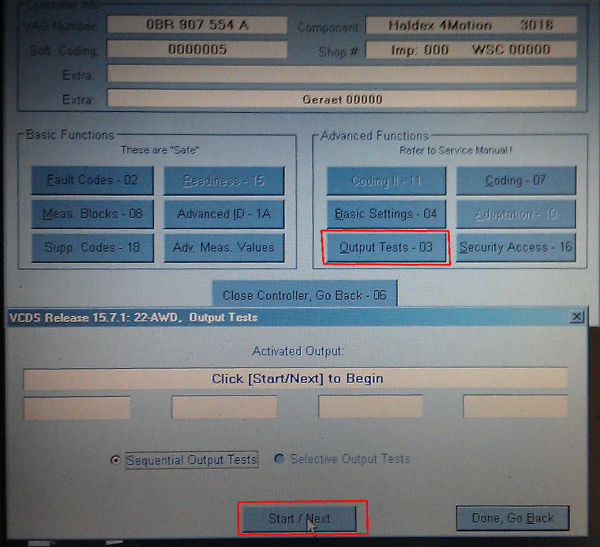
- Connect laptop with VAGCOM/VCDS to car, turn on ignition, select “AWD Unit 22” from the “Select Control Module” page. (or use screw method in video)
- Select “Output Tests – 03”, then keep clicking “Start / Next” until you see “Haldex Clutch Pump (V181) Activate”, then click again. (or use screw method in video)
Screw Method for Gen 4 Filter Removal
- The pump should run, you will see a current value in amps in the measure block increase from 0.00 to maybe 2.00. (or use screw method in video). Watch the youtube video of driving the filter out below:
- When you can hear the oil drizzling into the drain tray, then turn off the ignition.
- Now go back under the car, the filter retainer will be sticking out by approximately 10mm.
- You can now pull the white nylon filter retaining spindle out with some pliers/grips.
- Now fish out the freely moving filter cartridge from the hole, maybe use some long nose pliers if your fingers cannot grab it.
- Clean out any debris from the housing with blue roll etc.
-
- Drain Haldex oil from drain point as per diagram “labelled B”

- Drain Haldex oil from drain point as per diagram “labelled B”
- *******(If pump is being replaced follow instructions here for pump)********
- Insert the new filter cartridge/retainer and plate assembly in one piece, ensure you lubricate the rubber O rings first.
- Some force is required to overcome the friction of the O Rings. If this force is getting excessive, clean the aluminium housing of any corrosion using a blade or abrasive, but ensure you plug the housing with blue roll or rags to stop any debris from entering the chamber and clean out afterwards as required.
- Overcoming the friction of the first O ring requires force, but to overcome the second O rings friction use the 2 bolts for the filter cover. Gently pull in the filter using both Allen bolts a little at a time.
- Ensure drain bolt “labelled B” has been refitted.
- Remove fill point bolt “labelled A” – before removing clean out any corrosion from Allen head, ensure Allen key/socket fits correctly with good penetration.
- Fill with Haldex high performance coupling oil until fluid is level/over flowing from fill point.
- THEN CARRY ON WITH PURGING/BLEEDING THE SYSTEM AT BOTTOM OF PAGE
How to Replace the Pump (VW / Audi Group)
Firstly follow the instructions for filter change, until you reach:-
“*******(If pump is being removed follow instructions here for pump)******** Then.…”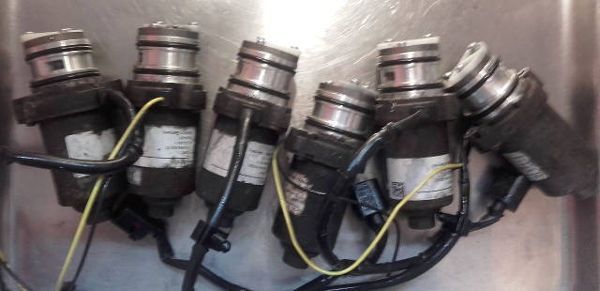
- Disconnect both electrical connectors on top of haldex ECU
- Remove Haldex ECU via 2 Allen bolts
- Remove 2 Allen bolts from pump.
- Twist pump to break the friction fit of internal rubber O rings.
- Withdraw the pump using twisting action while using a thin scraper in the gap as a lever to help withdraw pump from the housing.
- Once pump is removed, cut the cable above the pump.
- Pull pump cable/connector out from ECU side.
- Unlock/unlatch plastic cable clips (x3) on the top/side of haldex coupling.
- Clean out any debris from the pump housing.
- Lubricate rubber O rings on the new pump assembly.
- Fit new pump into housing ensuring the strainer gauze is at the bottom. (correctly rotated)
- Feed cable over the top of haldex coupling, clipping cable into existing 3 x cable clips.
- Refit haldex ECU, and reconnect both electrical connectors on the ECU.
- Continue Filter instructions + Bleed/Purge Instructions
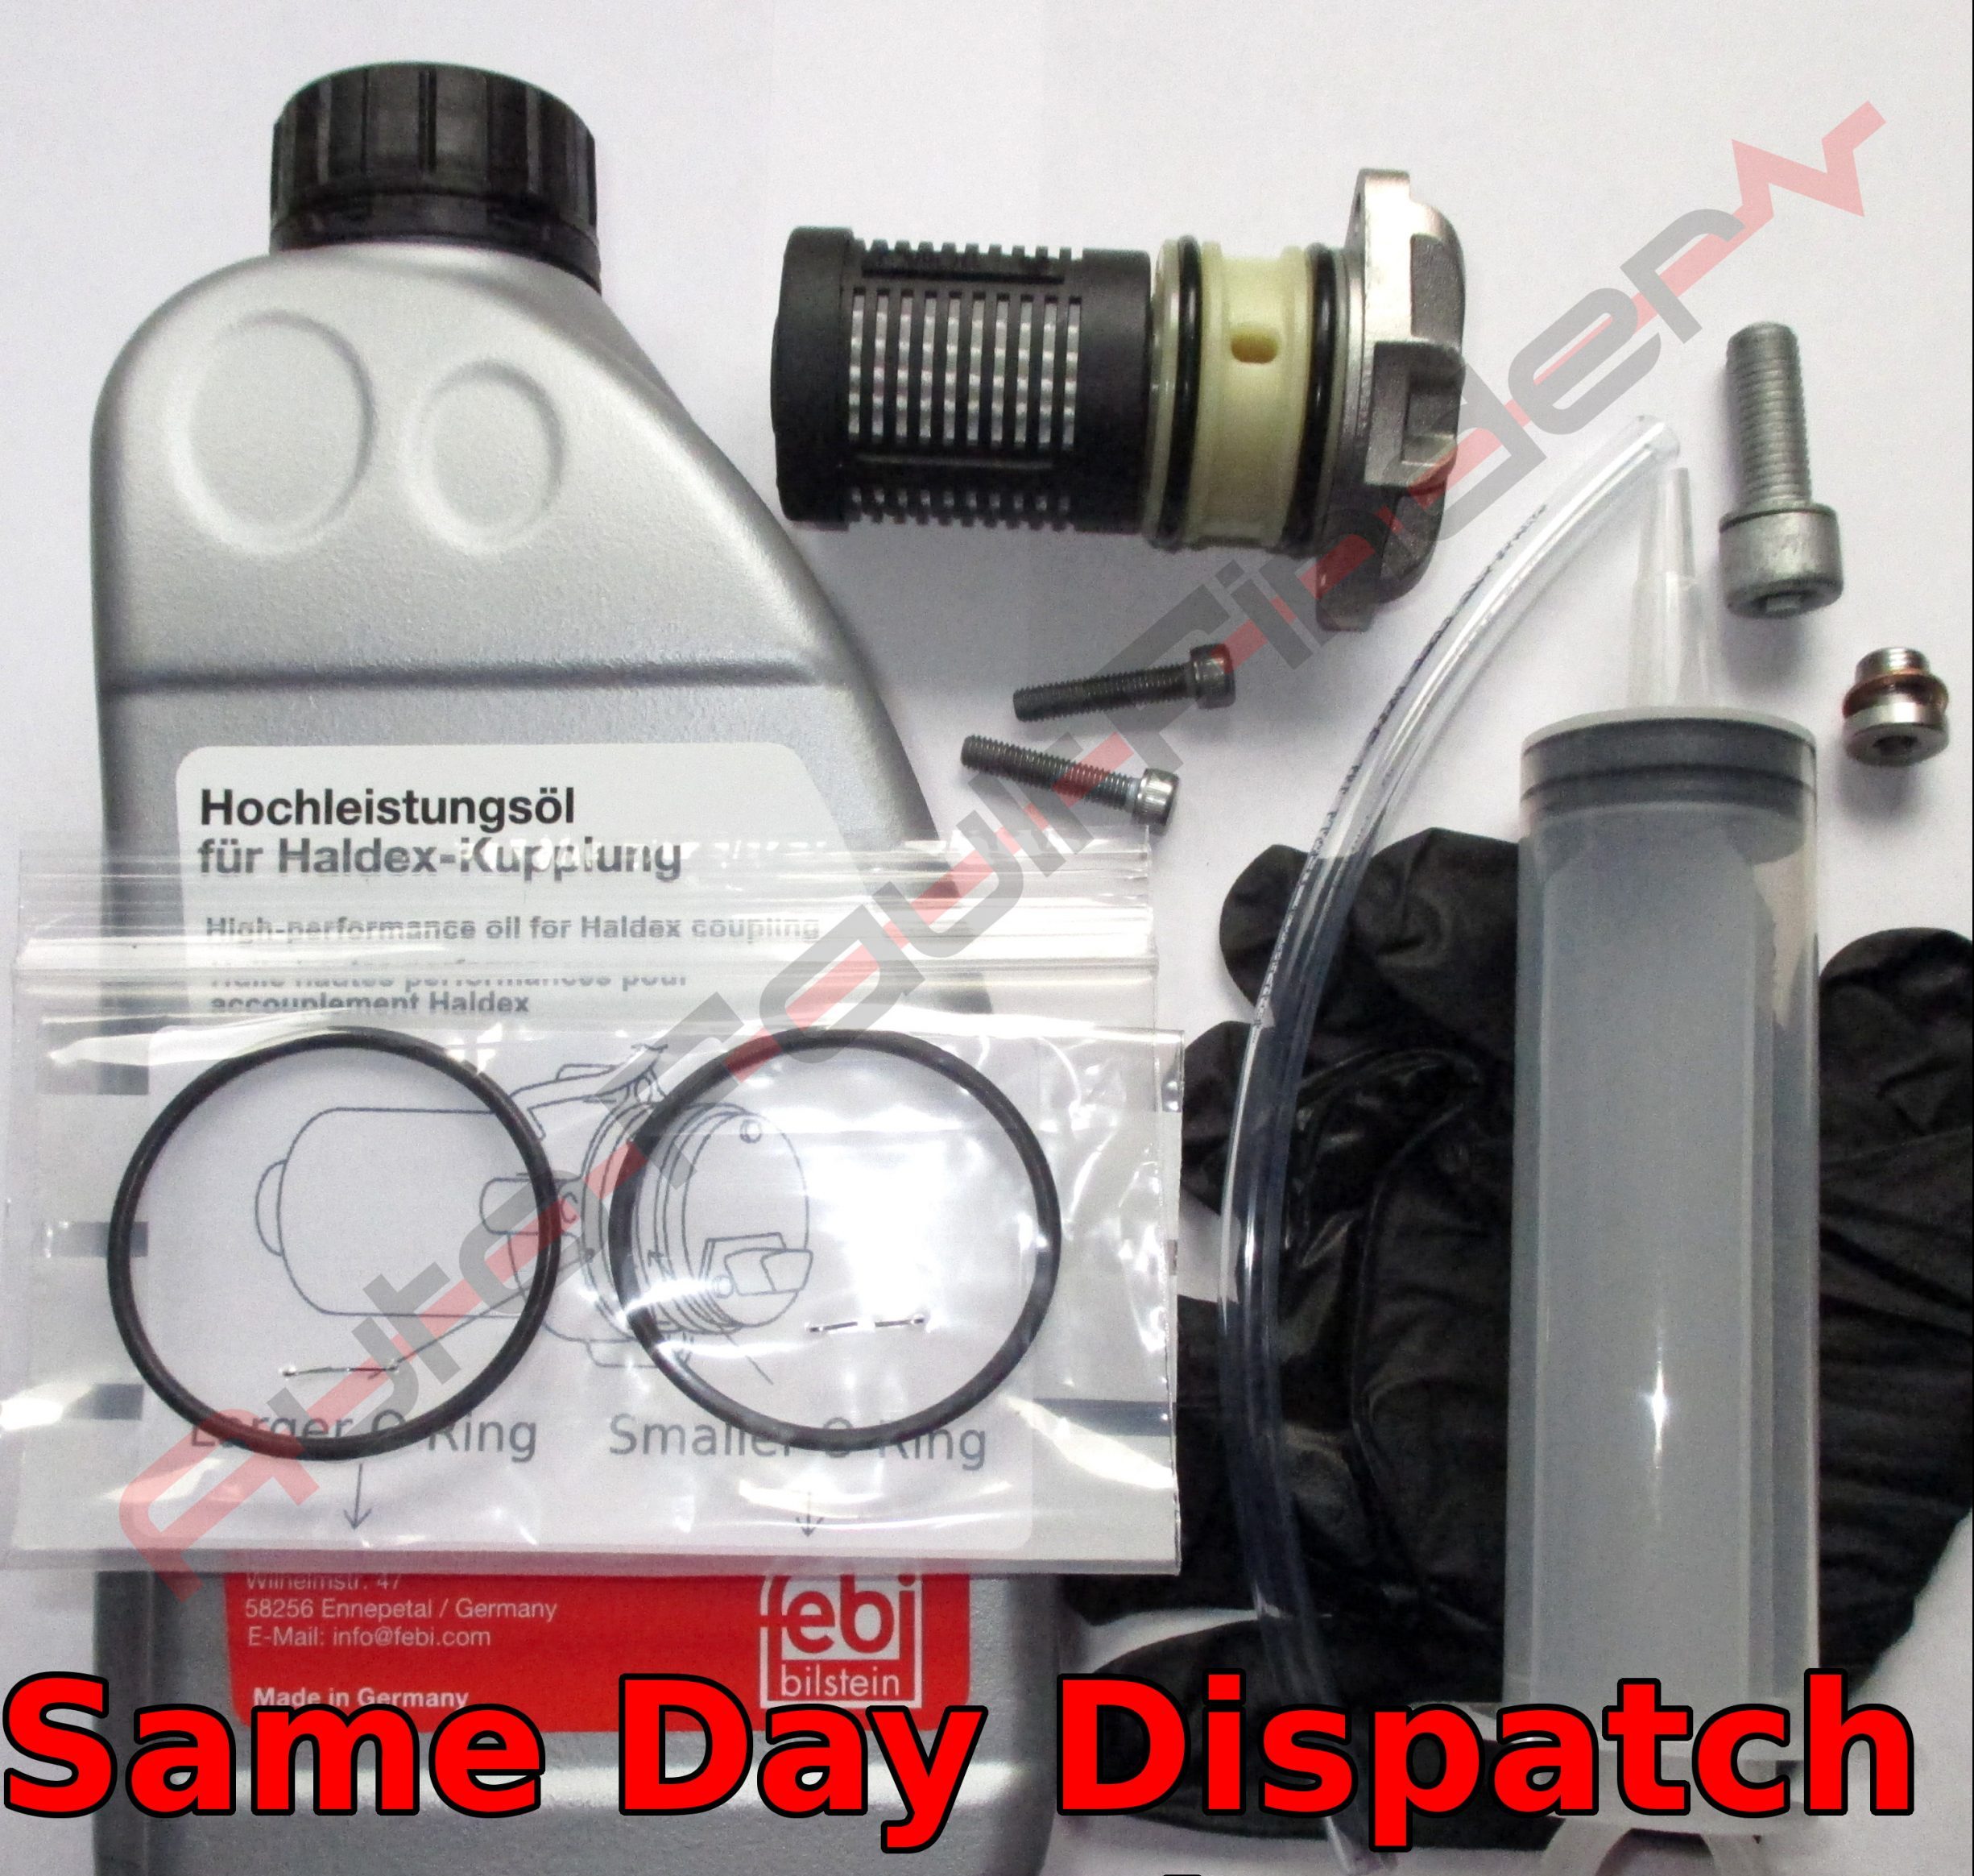
Gen 4 Ultimate Service Kit for VW Audi Seat Skoda
£70.00 / £58.33 Ex. VAT
Gen 4 Ultimate Service Kit for VW Audi Seat Skoda
£70.00 / £58.33 Ex. VAT
✔ UK Stock, same day dispatch if ordered before 4pm ✔ Royal Mail Special Delivery & Tracked 24 Next Day ✔ VAT Invoice & Tracking link with every order ✔ 100% 5 star reviews on Google, Facebook & eBay ✔...
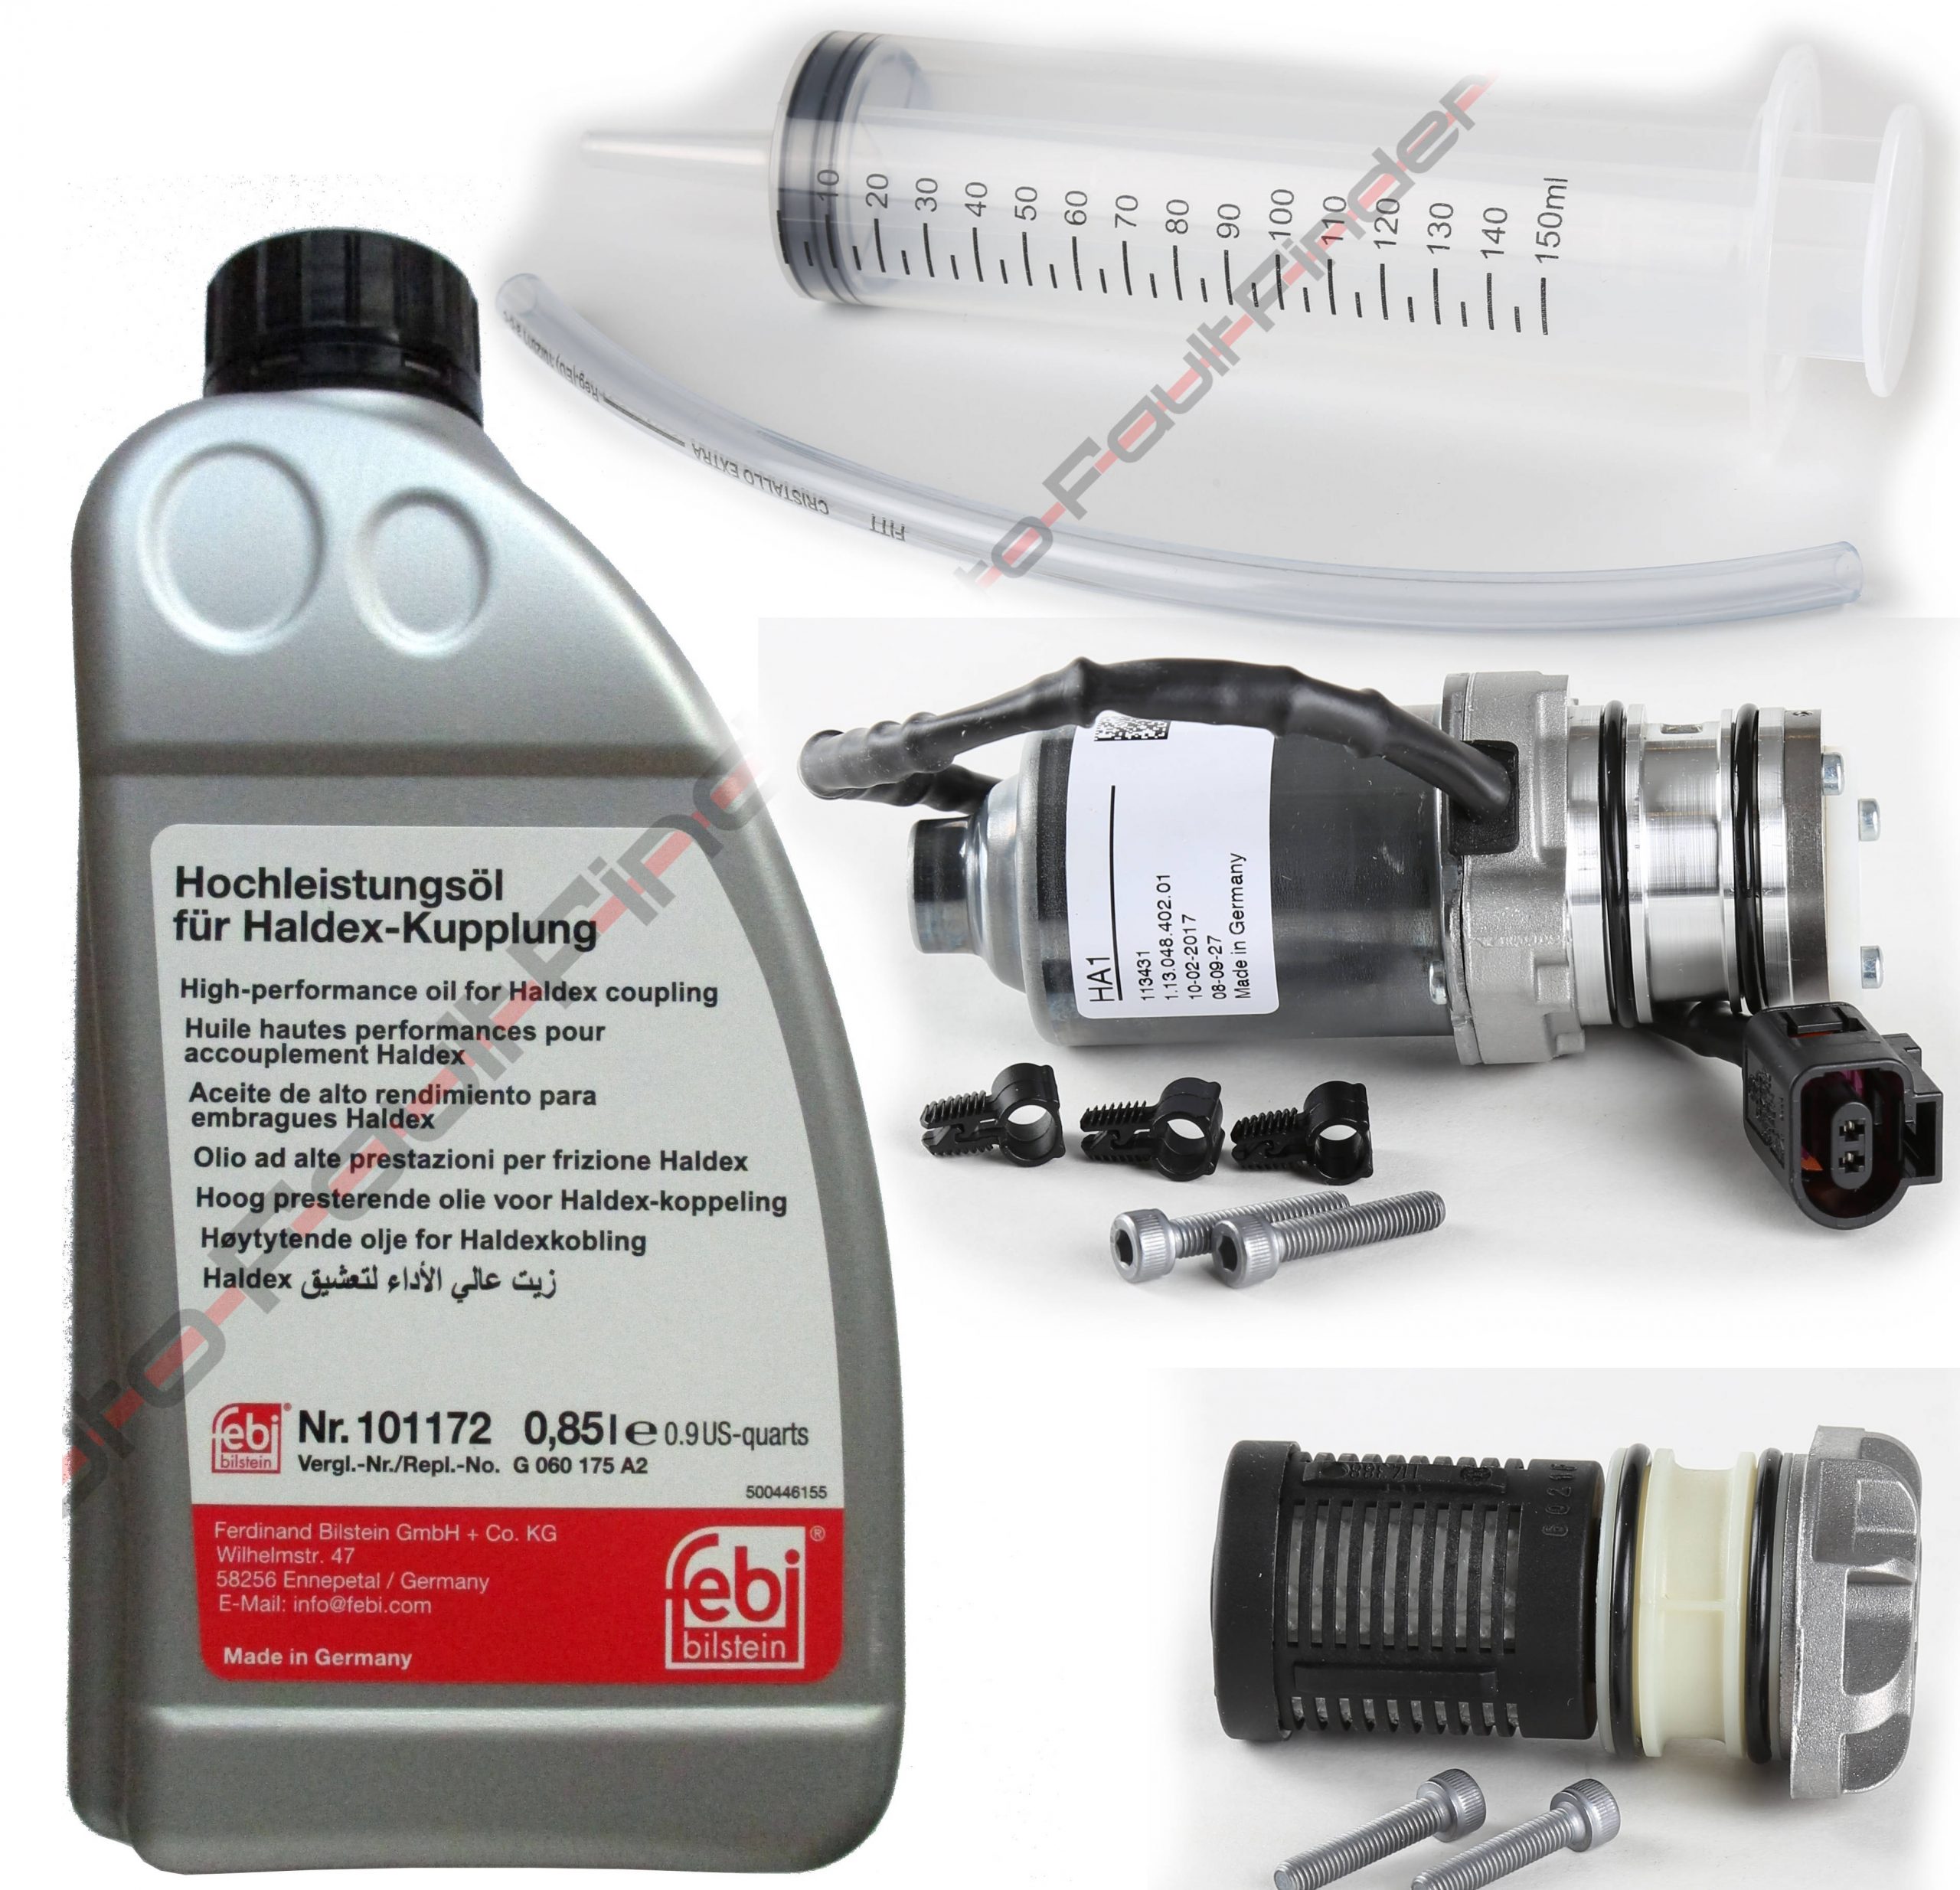
Gen 4 Haldex Pump Replacement Kit for VW Audi Seat Skoda 0AY598549A
£260.70 / £217.25 Ex. VAT
Gen 4 Haldex Pump Replacement Kit for VW Audi Seat Skoda 0AY598549A
£260.70 / £217.25 Ex. VAT
✔ UK Stock, same day dispatch if ordered before 4pm ✔ Royal Mail Special Delivery & Tracked 24 Next Day ✔ VAT Invoice & Tracking link with every order ✔ 100% 5 star reviews on Google, Facebook & eBay ✔...
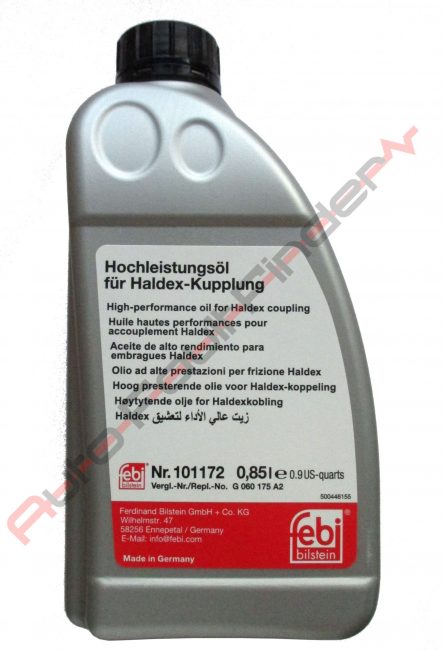
Febi Bilstein 101172 850ml Haldex Oil for Generation 2 + 3 + 4 + 5
£28.50 / £23.75 Ex. VAT
Febi Bilstein 101172 850ml Haldex Oil for Generation 2 + 3 + 4 + 5
£28.50 / £23.75 Ex. VAT
✔ UK Stock, same day dispatch if ordered before 4pm ✔ Royal Mail Special Delivery & Tracked 24 Next Day ✔ VAT Invoice & Tracking link with every order ✔ 100% 5 star reviews on Google, Facebook & eBay ✔...
How to Bleed / Purge the Haldex System (VW / Audi Group)
- Connect laptop with VAGCOM/VCDS to car, turn on ignition
- Select “AWD Unit 22” from the “Select Control Module” page.
- Select “Output Tests – 03”, then keep clicking “Start / Next” until you see “Haldex Clutch Pump (V181) Activate”, then click again.
- Run the Haldex pump for 1 minute, then press next to engage “All wheel drive (AWD) Clutch Engaged” – this opens the valve. Keep this running for 3 minutes.
- You will hear the air locks being pumped from the system, the pumps tone will fluctuate.
- Press next to disengage the Clutch valve, then next to disengage the pump. Keep pressing next to close the window. Close “22 – AWD” window and turn off ignition.
- Now repeat this process further twice until the pump makes a consistent sound indicating air locks have been purged.
- Now top up the oil until fluid is level/over flowing from fill point.
- Replace fill point bolt “labelled A”
- Expect to insert approximately 700ml of oil in total.
- Connect laptop with VAGCOM/VCDS to car, turn on ignition, select “AWD Unit 22” from the “Select Control Module” page.
- Click on “Fault Codes – 02”, clear any remaining fault codes on the unit.
THEN CONTINUE WITH TESTING THE SYSTEM
Test drive the car, find a safe and legal place to launch the car on slippery ground multiple times, ensure the 4wd system is working.
On low performance vehicles you may have to find a grass or other low friction surface to test 4wd system.
After multiple tests of the 4wd system, connect laptop with VAGCOM/VCDS to car, turn on ignition, select “AWD Unit 22” from the “Select Control Module” page. Click on “Fault Codes – 02”, ensure no fault codes have been triggered.